We are leveraging a plugin dedicated to education class scheduling. Therefore, some of the data fields and menu tabs may be called something related to an education industry.
What you will need before you start:
- All the text you want to include in your event such as:
- Event name
- Event date(s)
- Event time(s)
- The name and address of the venue where the event will occur
- One image file that represents your event and meets the following required criteria:
- JPG or PNG file format
- RGB color model
- 72 DPI resolution
- Image must already be cropped to the dimension of 1000 pixels wide by 442 pixels height NOTE: The software will use this image in a few places within the calendar module. Please be aware that the software will automatically crop the image to display a thumbnail of your event. The software apportions your image into thirds and conceals the left and right thirds of your image for display as the event’s thumbnail. Keep this in mind when determining which image best represents your event (or when you are working with your event’s graphic designer) so that nothing visually critical is left out from display.
- URL for whatever 3rd party web page you will navigate your users to should your event want to sell tickets, offer an event RSVP or provide a link for your video event
From the member login portal
- Log in using your provided user credentials assigned to you
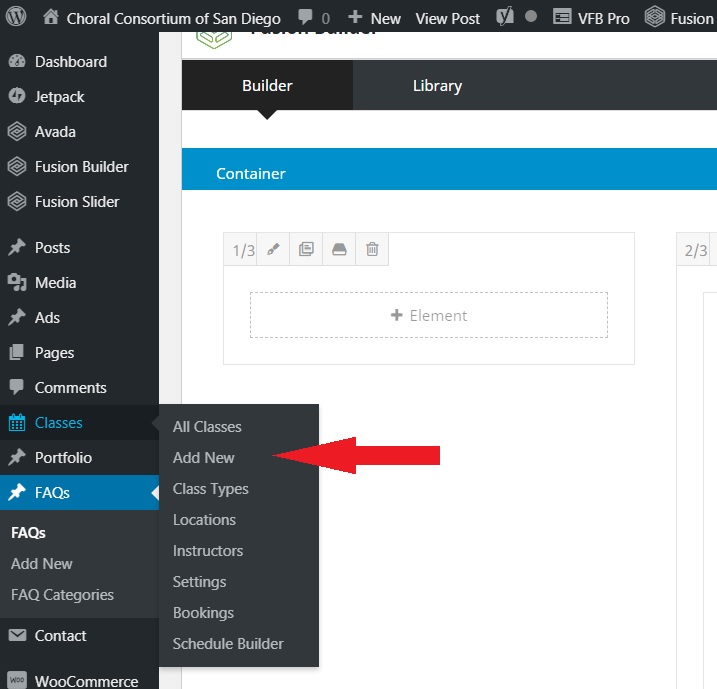
- At the main editing dashboard, look to the left (dark) menu side panel and mouse hover on the “Classes” option (Fig. 1)
- From the pop out menu that displays when you mouse hover, select the “Add New” option
(Fig. 1)
Input your Event Information
- In the new window that pops up, in the field “Add title”, please click your mouse in the field and enter the following:
- The full name of your Choral Ensemble followed by a hyphen
- The name of your event
- Hit the Enter key to accept the event title
- In the next text block directly underneath the title, click inside the block with your mouse and a cursor will appear. You can enter all the relevant information regarding your event (program, soloists, collaborative performers, special audience information, parking instructions, etc.) in this area. DO NOT enter any information regarding the date or venue location. There is another step where we will enter that data. Hit the Enter key when finished.
Adding your Event Image
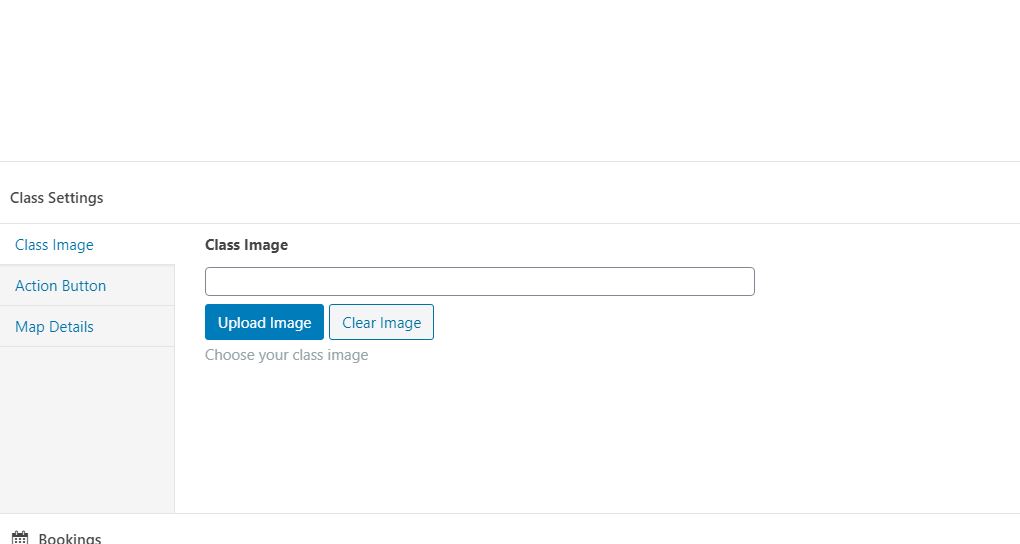
- Scroll down the page to the “Class Settings” area (Fig. 2)
- In the “Class Image” tab, click the blue “Upload Image’ button. (Fig. 3)
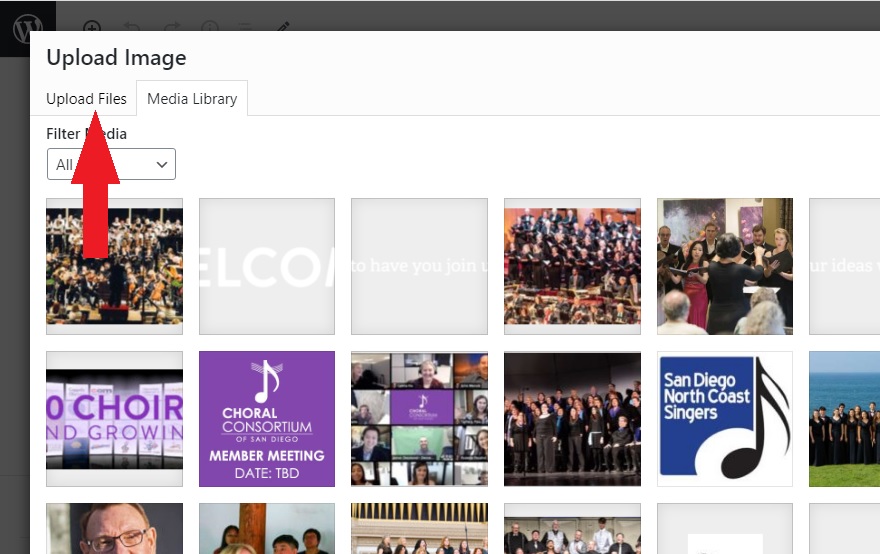
- The website’s image library will appear. Click the “Upload Files” tab in the upper left of your window.
- You can click and drag from your computer files or click on the “Select Files” button to browse your computer operating system for wherever you are currently storing your event’s image file. Click the blue “Insert Image” button to complete your upload.
(Fig. 2)
(Fig. 3)
Adding a Button for your Ticket Sales
(Skip to “Enter Your Event Date and Venue Information” if not selling event tickets)
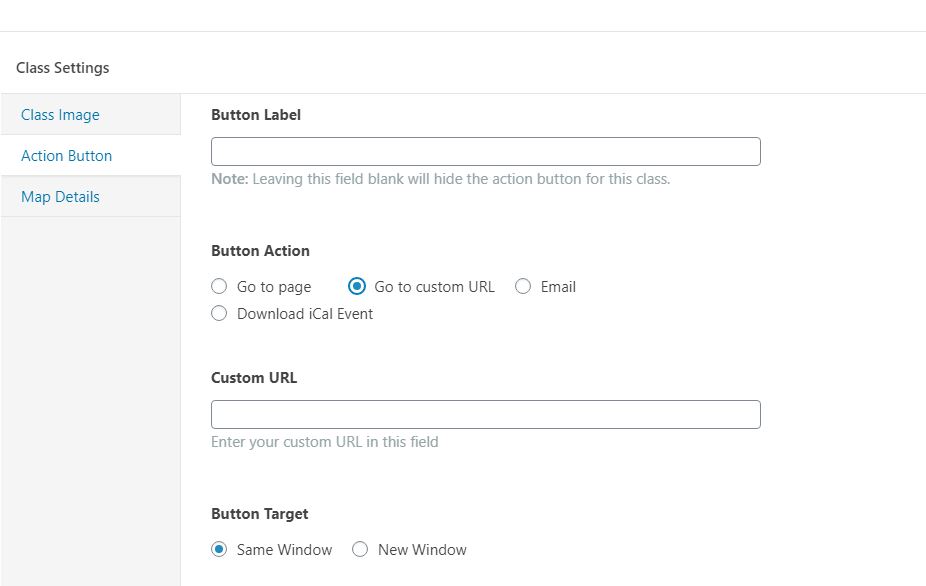
- In the left tabs area, click the tab for “Action Button” (Fig. 4)
- In the Button Label field, input, in ALL CAPITAL LETTERS, the type of action you want the user to invoke. Choose one option:
- GET TICKETS
- REGISTER
- REGISTER AND GET VIDEO LINK
- GET VIDEO LINK
- From the “Button Action” area, select the option for “Go to custom URL
- In the “Custom URL” data field that appears, the URL to your destination web page where you want the user to go to purchase tickets, RSVP or get their video link
- In the “Button Target” area, click the option for “New Window”
(Fig. 4)
Enter your Event Date and Venue Information
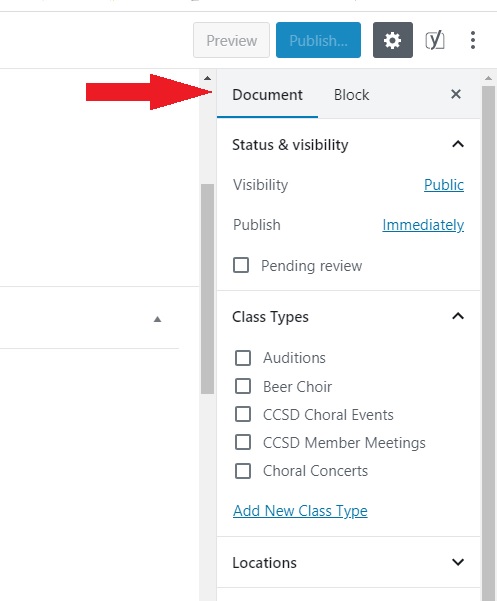
- In the upper right corner, click the “Document” option (Fig. 5)
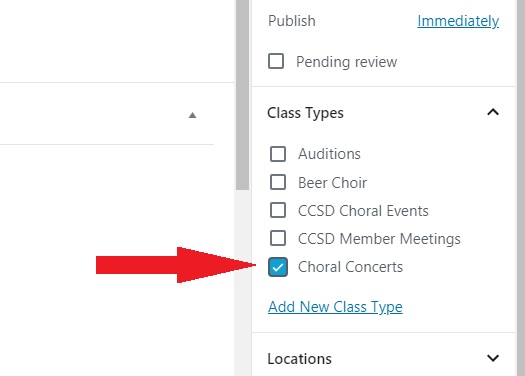
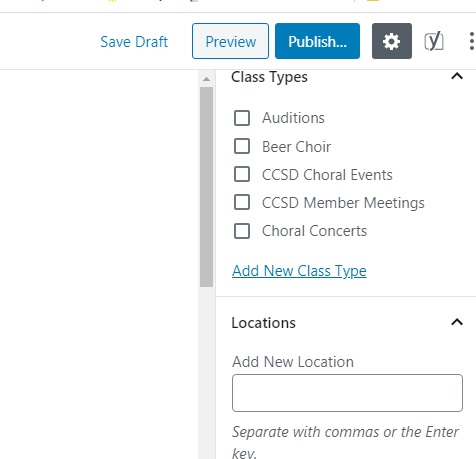
- Scroll down to “Class Types” and check the box for “Choral Concert.” IMPORTANT: Avoid checking the “CCSD Choral Events” box. That is reserved strictly for events that CCSD produces, such as the “San Diego SINGS!” event, in Balboa Park. (Fig. 6)
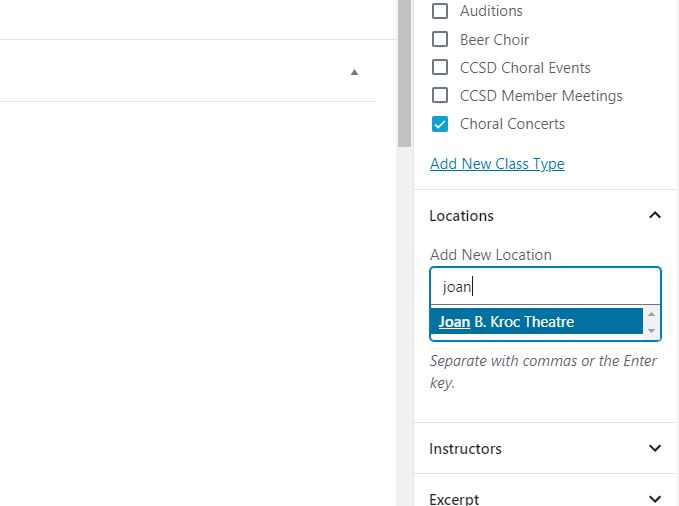
- Scroll down and click on the “Locations” tab downward arrow
- Begin to type the first few letters of your event venue’s name. (Fig. 7)
- If the website already maintains the name of the venue in its database, the venue name will pop up. Click the venue name to select.
- IMPORTANT: If you are creating an event that will be virtual (example: Using Zoom for real-time performance or releasing a video on YouTube for a specific date/time), select the location known as “Online Event.”
- If the venue name does not appear, skip this data field. You will need to email CCSD website administration and provide the name of your venue. CCSD will be responsible for either creating the venue in its database or selecting the correct venue name from its existing files after you have completed your data entry. Don’t worry. There are plenty of venues in San Diego County with alternative names (Example – “Joan B. Kroc Theatre” vs. “Kroc Community Center Performing Arts Center”) We can take care of displaying the correct venue name in these situations.
- Click the “Locations” upward arrow to collapse this data tab.
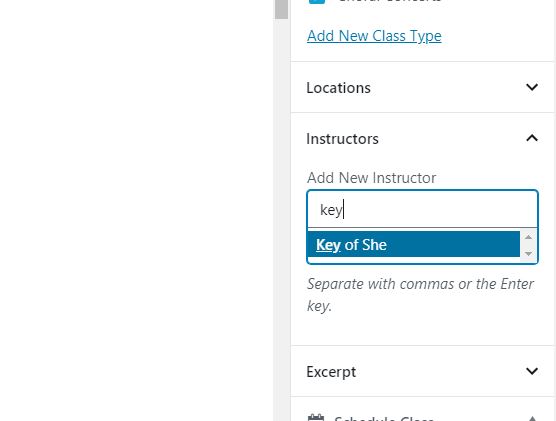
- In the “Instructors” tab, begin to type the first few letters of your choral ensemble’s name. NOTE: If the choral ensemble’s name does not appear, skip this data field. You will need to email CCSD website administration and provide the name of your choir’s. CCSD will investigate and resolve for you after you have completed your data entry. (Fig. 8)
- Click the “Instructors” upward arrow to collapse this data tab.
- Click the “Schedule Class” tab downward arrow if not already open.
- Click the first data field to provide the date and year of your event. A calendar popup will appear where you can select the month, date, and year.
- Click in the second data field to set the start time of your event (in military time).
- If your event starts at time other than straight up on the hour, click the third data field to set the event’ start time in minutes. (Fig. 9)
- If your event spans multiple days in a row, click the checkbox “This is a multi-day events” and select your event series last date and start time. Otherwise, skip to the next step.
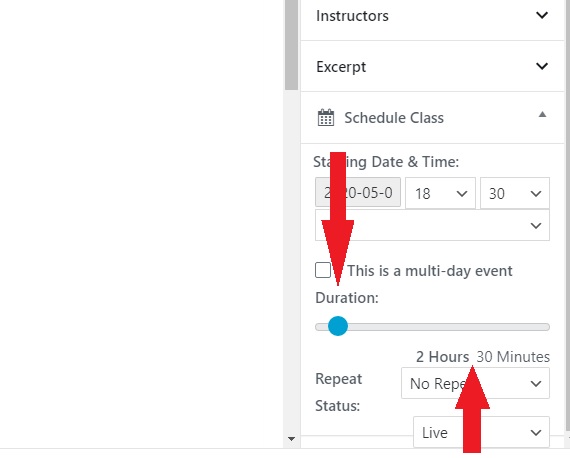
- Using the blue dot slider bar, click and drag to set the duration of your event. (Fig. 10)
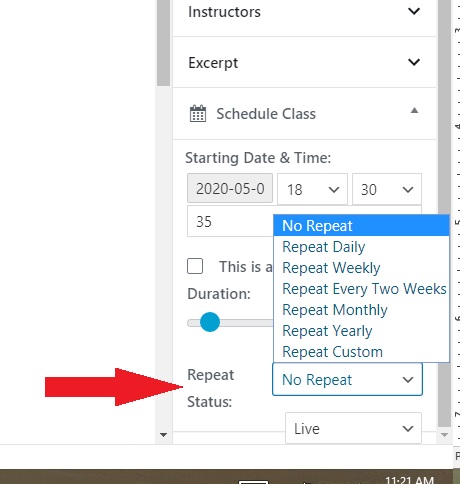
- If your event repeats more than once (weekly, daily, monthly, etc.), click the “Repeat Status” drop down menu and select the appropriate repeat frequency. (Fig. 11)
(Fig. 5)
(Fig. 6)
(Fig. 7)
(Fig. 8)
(Fig. 9)

(Fig. 10)
(Fig. 11)
Save and Publish Your Event
- Review all your data field entries and check for accuracy. Correct as needed.
- Scroll to the top of the page. In the upper right corner you will see two buttons – “Preview” and “Publish.” (Fig. 12)
(Fig. 12)
- Click the left “Preview” button. In a new browser tab, you will be shown a style-only preview of how your event will display.
IMPORTANT: The preview function does NOT display the accurate data of your event. It is only to demonstrate the text styling and layout. - When everything is ready to publish, scroll up to the top of the page and click the blue “Publish” button. Your event is now part of our website and viewable by the public. If you spot anything in the public display of your event that is not shown as expected, return to the event configuration to correct any entries.
- Log out of the website’s editor module.