If you are changing an existing event that was created by another person in your organization, be sure to first review the FAQ “How to Add an Event to Our Calendar” in order to familiarize yourself with what is required for content, materials and some of the data field instructions.
From the member login portal
- Log in using your provided user credentials assigned to you
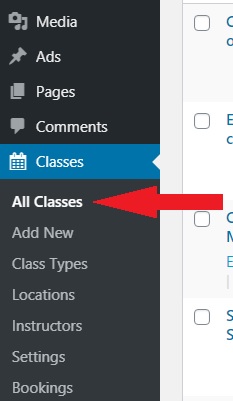
- At the main editing dashboard, look to the left (dark) menu side panel and mouse hover on the “Classes” option (Fig. 1)
- From the popout menu that displays when you mouse hover, select the “All Classes” option
(Fig. 1)
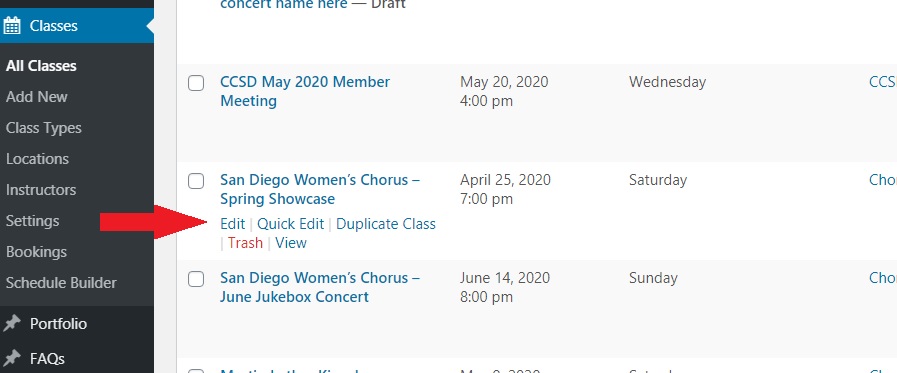
Search for your event in the existing listings
- You can search by the name of the event using the search field or scroll down the list until you find your choir’s event. (Fig. 2)
- Click the link for “Edit”
Fig. 2
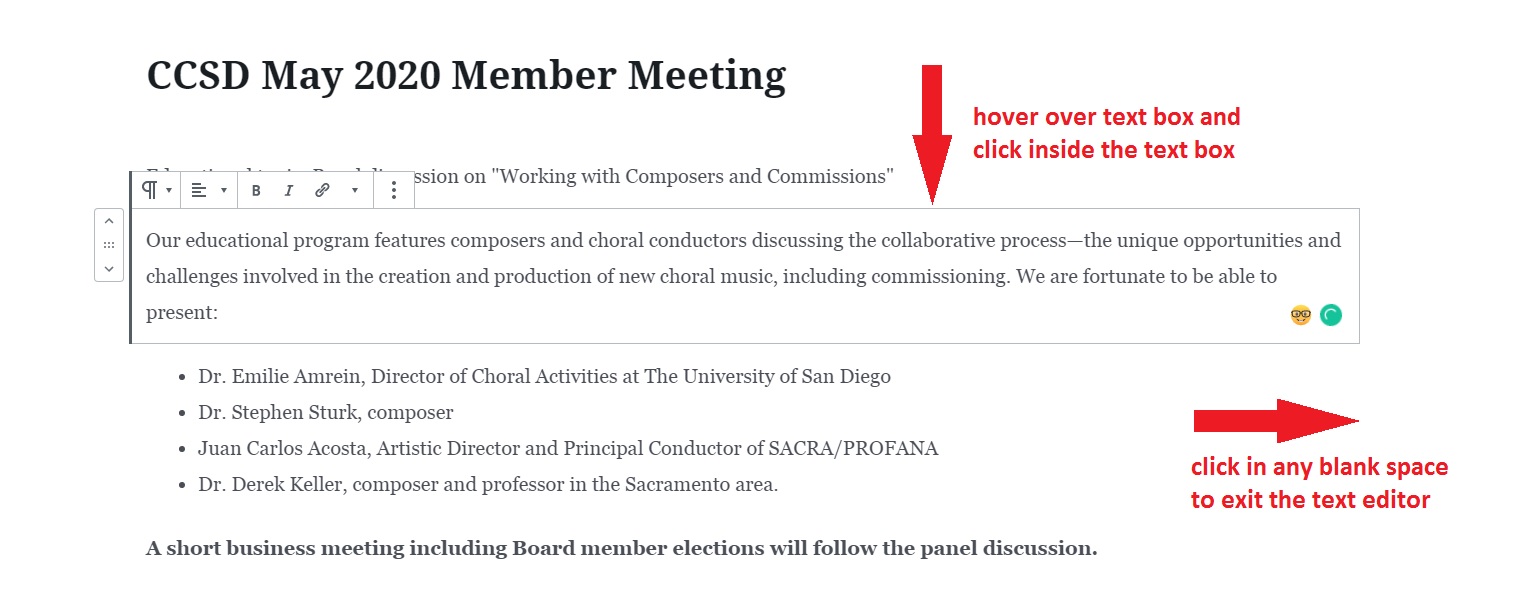
Edit your Event Information
- In the new window that pops up, you may edit any of the event details text boxes by placing your cursor inside the box(es), editing your text and then clicking anywhere outside the box to complete your edit. (Fig. 3)
- You can enter all the relevant information regarding your event (program, soloists, collaborative performers, special audience information, parking instructions, etc.) in this area. DO NOT enter any information regarding the date or venue location. There is another step where we will enter that data. Hit the Enter key when finished.
- If you are finished with your edits, skip down to “Submit your edits.”
(Fig. 3)
Changing your Event Image
- Scroll down the page to the “Class Settings” area (Fig. 4)
- In the “Class Image” tab, click the blue “Upload Image’ button. (Fig. 5)
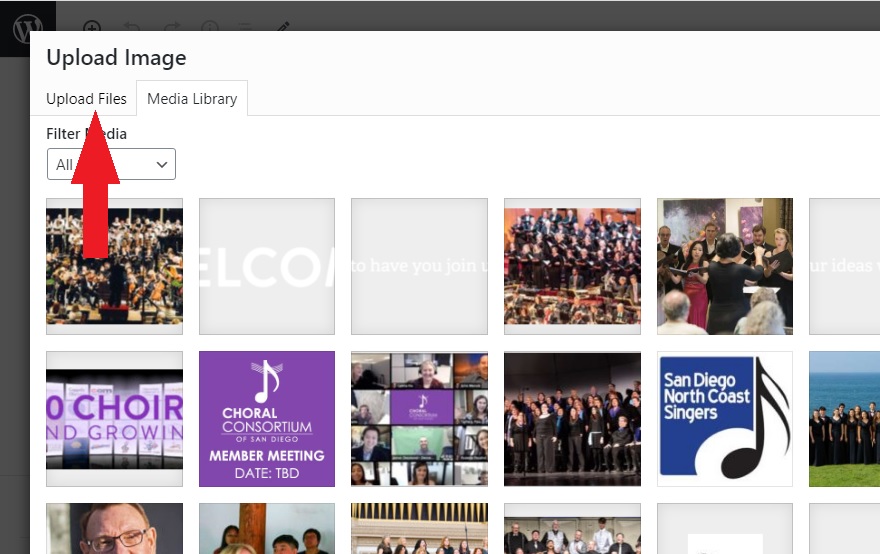
- The website’s image library will appear. Click the “Upload Files” tab in the upper left of your window.
- You can click and drag from your computer files or click on the “Select Files” button to browse your computer operating system for wherever you are currently storing your event’s image file. Click the blue “Insert Image” button to complete your upload.
(Fig. 4)
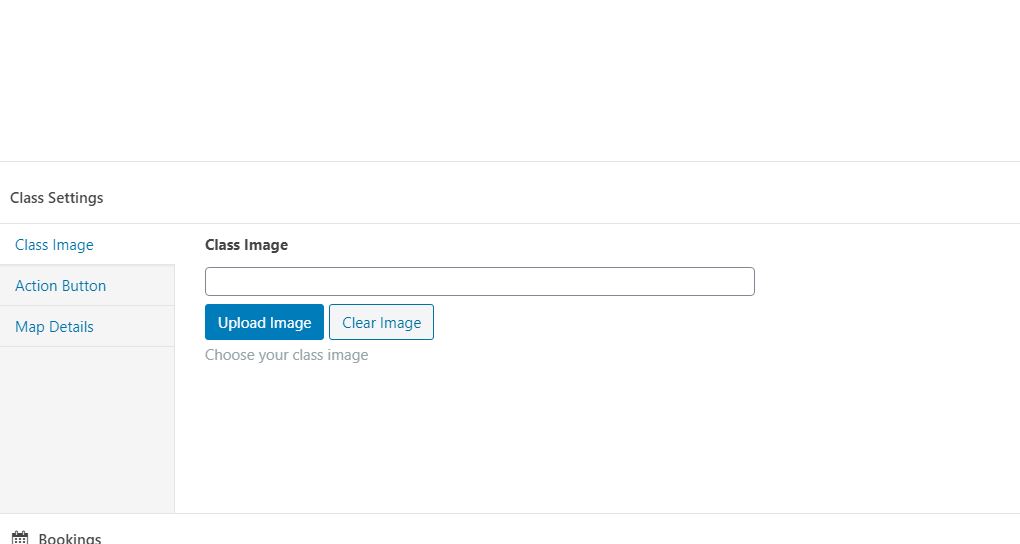
(Fig. 5)
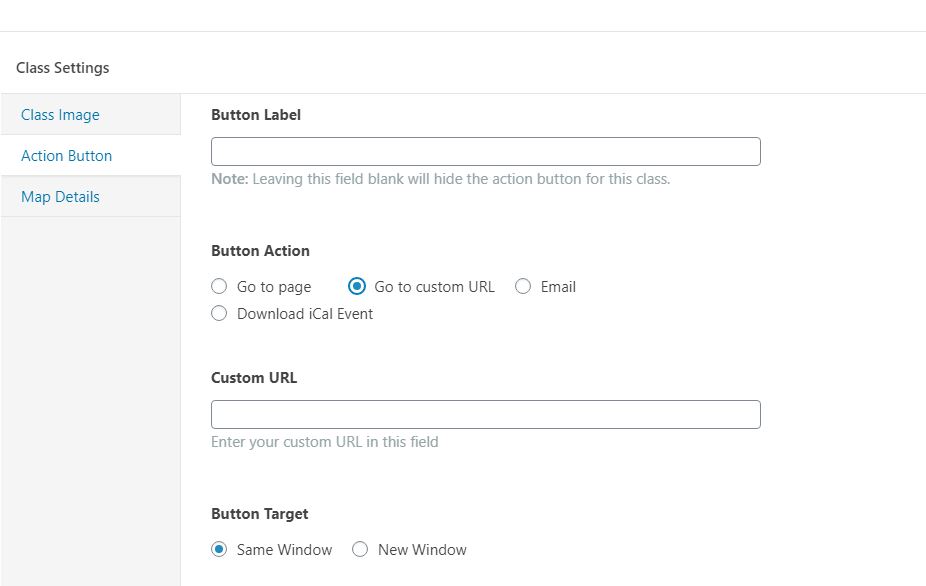
Adding/Editing the Action Button
(Skip to “Changing Your Event Location and Date Information” if not selling event tickets)
- In the left tabs area, click the tab for “Action Button” (Fig. 6)
- In the “Custom URL” data field that appears, enter the URL to 3rd party web page
- In the “Button Target” area, click the option for “New Window”
(Fig. 6)
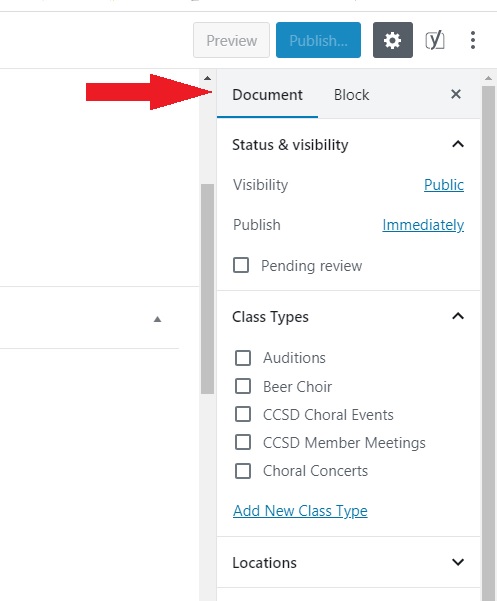
Changing your Event Location and Date Information
- In the upper right corner, click the “Document” option (Fig. 7)
- Scroll down and click on the “Locations” tab downward arrow
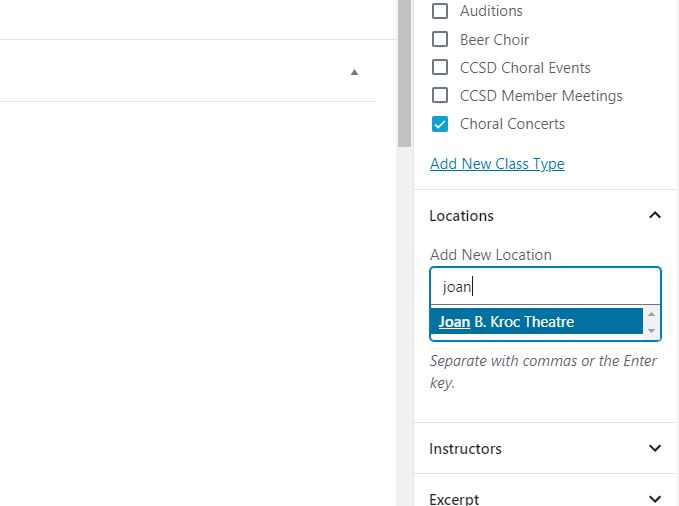
- Begin to type the first few letters of your event venue’s name. (Fig. 8)
- If the website already maintains the name of the venue in its database, the venue name will pop up. Click the venue name to select
- If the venue name does not appear, skip this data field. You will need to email CCSD website administration and provide the name of your venue. CCSD will be responsible for either creating the venue in its database or selecting the correct venue name from its existing files after you have completed your data entry. Don’t worry. There are plenty of venues in San Diego County with alternative names (Example – “Joan B. Kroc Theatre” vs. “Kroc Community Center Performing Arts Center”) We can take care of displaying the correct venue name in these situations.
- Click the “Locations” upward arrow to collapse this data tab.
- Click the “Schedule Class” tab downward arrow if not already open.
- Click the first data field to provide the date and year of your event. A calendar pop up with appear where you can select the month, date, and year.
- Click in the second data field to set the start time of your event (in military time).
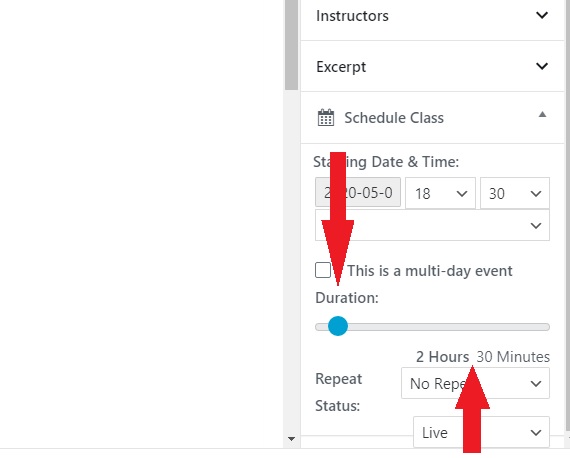
- If your event starts at a time other than straight up on the hour, click the third data field to set the event’ start time in minutes. (Fig. 9)
- If your event spans multiple days in a row, click the checkbox “This is a multi-day events” and select your event series last date and start time. Otherwise, skip to the next step.
- Using the blue dot slider bar, click and drag to set the duration of your event. (Fig. 10)
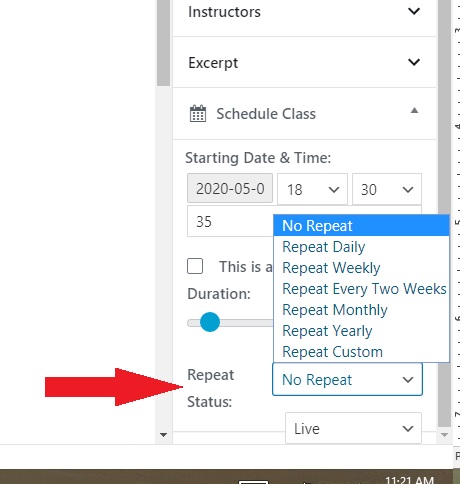
- If your event repeats more than once (weekly, daily, monthly, etc.), click the “Repeat Status” drop-down menu and select the appropriate repeat frequency. (Fig. 11)
(Fig. 7)
(Fig.8)
(Fig. 9)

(Fig. 10)
(Fig. 11)
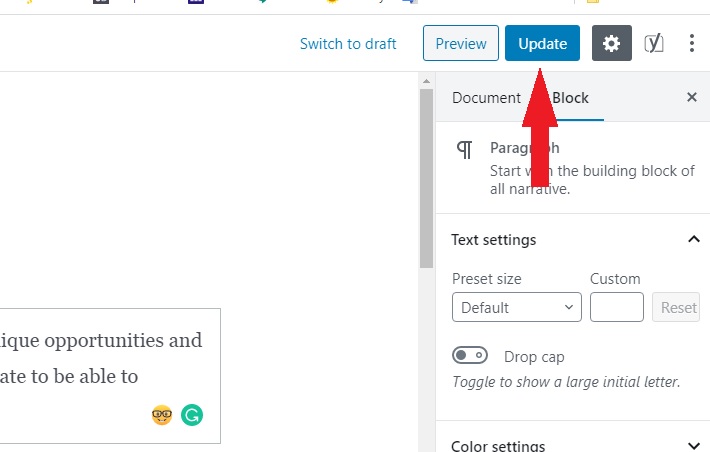
Submit your Edits
- When you have completed your edits, scroll to the top of web page and click the blue “Update” button. (Fig 12.)
- Your edits are now saved. You can view the Calendar page to review your events display.
Fig. 12